How to Start a Compost Pile Step by Step
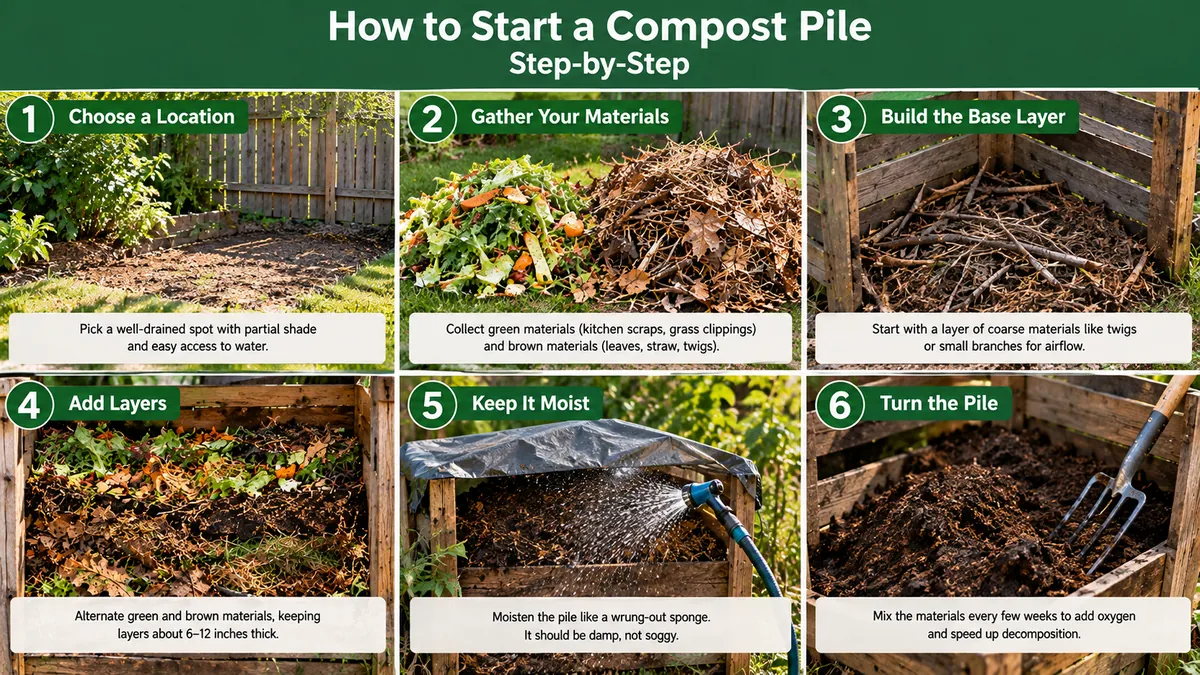
Starting a compost pile is straightforward when you prepare a suitable location, gather a mix of ingredients, and manage moisture and airflow from the beginning. You do not need to buy every composting accessory before you start. A designated area, a supply of dry browns, suitable kitchen and garden scraps, and a way to add water are enough for many simple systems. The steps below work for an open pile or a basic stationary bin, with adjustments for the equipment you choose.
1. Prepare the location and system
Choose a reasonably level place with good drainage and convenient access from the kitchen and garden. Leave room to add material, turn it if needed, and remove finished compost. Avoid locations where runoff could carry compost liquid into a stream or drain. A bin can keep material contained, but an open pile is also workable where local rules and space allow. Make sure the system has openings or a structure that allows air to enter.
2. Gather greens and browns
Collect nitrogen-rich greens such as fruit and vegetable scraps, fresh grass clippings, and tender plant trimmings. Gather carbon-rich browns such as dry leaves, straw, and shredded untreated cardboard. It is helpful to have more dry browns available than you expect to need, because kitchen scraps and grass can be wetter than anticipated. Do not add meat, dairy, grease, pet waste, chemically treated wood, or contaminated plant material to a typical backyard pile.
3. Chop or shred bulky ingredients
Smaller pieces generally decompose faster because they expose more surface area to microorganisms. Tear cardboard, shred leaves, chop thick stems, and break up compacted grass clippings. You do not need to finely chop every peel or leaf; the goal is to avoid a pile dominated by large, dense pieces that are slow to break down. Leave very large branches out or process them separately.
4. Create an airy base when needed
If the site is prone to wetness or the bin has a solid base, start with a loose layer of coarse plant material to encourage airflow and drainage. Small twigs or coarse stems can help, provided they do not block access to the finished compost. This step is not essential in every system, especially a well-ventilated bin on drained soil. Avoid building a base so thick that it prevents the rest of the pile from contacting and mixing properly.
5. Mix the browns and greens
Add a mixture of browns and greens rather than relying on deep, rigid layers. For example, place a bucket of vegetable scraps into the pile, spread them through a layer of leaves, and add a little more dry material to cover the scraps. If adding grass clippings, break up clumps and blend them with leaves or straw. The proportions will vary with the wetness of the ingredients; the pile should not be dominated by slimy greens or remain a heap of dry leaves.
A practical example is a mix of autumn leaves, vegetable scraps, and grass clippings. Shred the leaves if possible. Mix a modest amount of grass clippings and vegetable scraps into the leaves, then check the moisture. If the leaves remain dry while the scraps are soggy, add water as you mix and distribute the wet material more evenly. If the pile becomes compacted, add coarse browns and loosen it. The goal is a uniform, springy mixture with a range of particle sizes.
6. Moisten the materials evenly
Compost organisms need moisture, but they also need oxygen. Water the pile as you build it if the ingredients are dry, mixing so that the water reaches the interior. The texture should resemble a wrung-out sponge: damp to the touch, not dripping. A handful should hold together loosely when squeezed, and only a few drops should come out under pressure. If water streams out, the pile is too wet; mix in dry browns and improve drainage. If it crumbles into dust, add water gradually.
7. Build enough volume for your method
A small pile can compost, but it may not retain enough heat for active hot composting. If you want a hot pile, gather enough material to create a substantial mass and build it with a balanced mix, good moisture, and air. The exact size needed depends on the materials, climate, and pile shape. If you only have a small amount of waste, do not force it into a large system; cold composting or a suitable worm bin may be more practical.
8. Cover loosely if conditions require it
A cover can help keep heavy rain from saturating the pile and reduce moisture loss in dry weather. Use a breathable cover or leave ventilation openings so the pile does not become sealed and airless. A tight, waterproof wrap that traps water or prevents oxygen exchange can create problems. Adjust the cover seasonally and check moisture underneath it rather than assuming the pile will remain balanced on its own.
9. Check periodically and correct problems early
Inspect the pile every week or two at first. Check whether it is damp, whether food scraps are covered, and whether the smell is earthy or unpleasant. If it is too wet or smells rotten, mix in dry browns and restore air spaces. If it is dry and inactive, add water and mix. If it is slow but otherwise healthy, consider particle size, ingredient balance, and the season before making large changes. Turning can help, but constant handling is not required for a low-maintenance pile.
Mixing versus layering
Layers can be a convenient way to assemble a pile, but thick layers may create separate zones: wet grass can mat, while leaves above it remain dry. Mixing spreads moisture and nutrients more evenly and gives decomposers access to a broader range of ingredients. If you do layer materials, use thin layers and mix them when convenient. Covering fresh food scraps with browns is particularly useful for odor and pest control.
Let the pile mature
Once the pile is built, give it time. Active compost may warm, shrink, and change texture; a cold pile may show slower changes. Add new material continuously if you use a continuous system, but remember that the newest scraps will not be as mature as older material. A separate batch or a second bin makes it easier to allow one portion to finish. Use compost when it is mostly dark and crumbly, smells earthy, and has cooled and stabilized. Starting carefully makes later maintenance much easier.
Next Article: Managing Moisture, Airflow, and Temperature